
Gravel Bike · Buying specs
Questions about Gravel Bike specs
Straight answers on the specs that matter when you buy — each question covers one dimension or option so you know what to look for.
Open Gravel Bike guide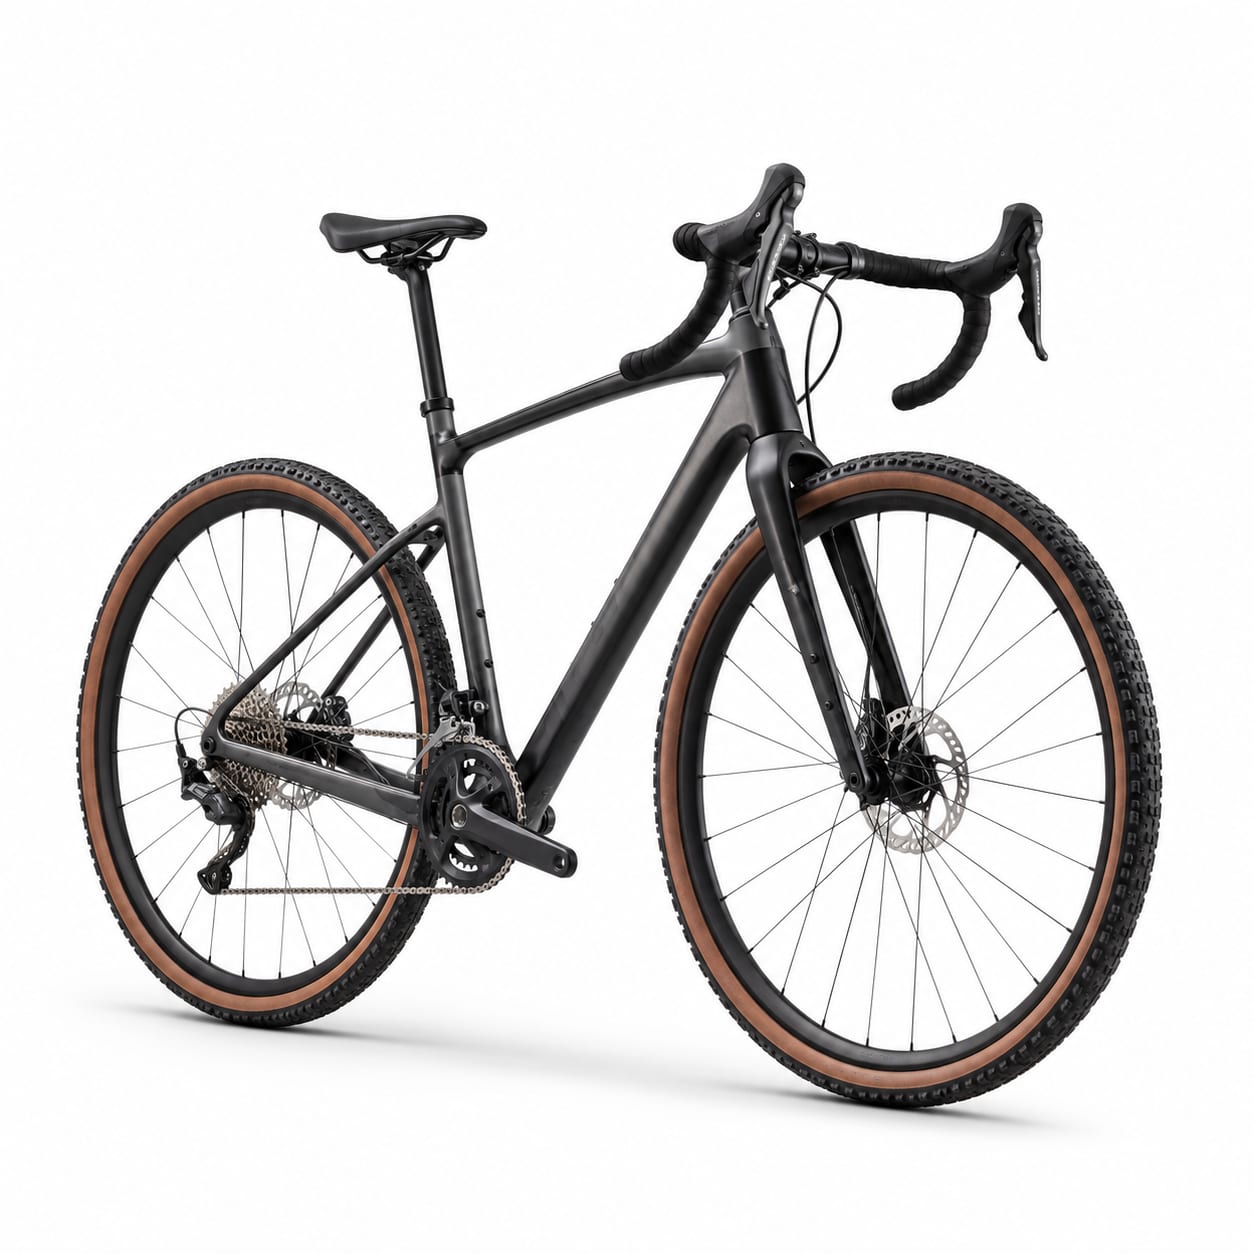
33 questions
Browse by spec group
Questions are organized the same way as the buying specs on the main equipment page.
Frame & Construction
Core frame attributes defining the bike's material, weight, and build standards.
Is a carbon fiber frame worth it for a gravel bike, or should I save money with aluminum?
Carbon fiber is the go-to material if you're prioritizing performance and long-ride comfort on your gravel bike. It's the lightest option available, and engineers can tune the layup — meaning they can make certain areas stiff for power transfer while allowing other sections to flex and absorb vibration. That tunability is a real advantage on rough gravel roads where you're spending hours in the saddle. The trade-off is cost and durability. Carbon frames sit at a higher price point, and while they handle normal riding loads beautifully, they can be more vulnerable to sharp impacts like crashes or rock strikes. They don't dent like aluminum or steel — they can crack. So if you're regularly tackling aggressive terrain with high crash risk, that's worth considering. Carbon makes the most sense for gravel racing, fast group rides, and long-distance comfort where every gram and every bit of vibration damping counts. For casual riding or bikepacking on a budget, aluminum with a carbon fork is a smart alternative that still gives you decent front-end compliance.
Read answer →Frame Material · Aluminum AlloyIs an aluminum gravel bike frame a good choice, or will the ride be too harsh?
Aluminum gravel bikes are an excellent value and a smart entry point for most riders. They're stiff, durable, and can take a beating on rough roads or during bikepacking trips — plus they're far more crash-resistant than carbon fiber if you happen to go down. The biggest concern shoppers have is ride harshness, and it's a fair point — aluminum does transmit more road vibration than carbon or steel. But here's the thing: most modern aluminum gravel bikes come with a carbon fork, which dramatically improves front-end comfort and takes the edge off choppy terrain. Wider tire clearance on gravel bikes also helps, since running 38mm+ tires at lower pressures absorbs a lot of the buzz that would otherwise reach you. If you're budget-conscious or just getting into gravel riding, aluminum is hard to beat. You get a capable, reliable frame without the premium price tag, and you can always upgrade components later as your riding evolves.
Read answer →Frame Material · Steel (Chromoly)Why would I choose a steel gravel bike over carbon or aluminum?
Steel (specifically chromoly) gravel frames are beloved for their smooth, compliant ride quality that absorbs road buzz and trail chatter better than any other material. If you're planning long bikepacking trips, multi-day expeditions, or just value comfort over speed, steel's natural vibration damping makes a real difference on rough terrain after hours in the saddle. The trade-off is weight—steel is the heaviest frame option. But that weight matters less when you're already loaded with bags and gear, and steel's strength means it handles heavy loads without feeling flexy or unstable. It's also incredibly durable and, unlike carbon, can be repaired by a skilled welder if damaged. Steel is ideal if you want a bike for life. It resists fatigue over years of hard use, won't corrode like aluminum, and develops a loyal following among riders who prioritize ride feel and long-term reliability over shaving grams.
Read answer →Frame Material · TitaniumWhy would I choose a titanium gravel bike frame over carbon or steel?
Titanium combines the best qualities of carbon and steel. It's nearly as light as carbon but absorbs vibrations like steel, making it incredibly comfortable on long, rough gravel rides. It's also naturally corrosion-resistant, so you never worry about rust—even after rainy bikepacking trips or sweaty trainer sessions. The catch is cost. Titanium frames are significantly more expensive than carbon, aluminum, or steel. You're paying for a frame that can genuinely last a lifetime, and many titanium builders back that claim with lifetime warranties. Titanium makes the most sense if you're building a premium bikepacking rig, want one bike for life, or prioritize ride quality above all else. If you're racing or on a tighter budget, carbon or aluminum will serve you well for less money.
Read answer →WeightHow much should my gravel bike weigh, and does weight really matter for gravel riding?
Gravel bikes typically range from about 7.5kg up to 12.5kg. Under 8.5kg is considered race-weight with a premium build, 8.5–9.5kg is the sweet spot for mid-range gravel bikes, 9.5–11kg covers bikepacking-ready aluminum and steel builds, and anything over 11kg is usually a heavy touring or budget build. Here's the thing: weight matters far less on a gravel bike than on a road bike. You're already riding wider, heavier tires at lower pressures, and the terrain naturally slows you down. A lighter bike will feel snappier on climbs and accelerations, but the difference becomes negligible once you load up bikepacking bags and gear — which can easily add 5–10kg on its own. The common trap is obsessing over grams while sacrificing things that actually improve your ride, like tire clearance, mounting points, or a comfortable frame. A 10kg gravel bike that fits your adventure needs will serve you far better than an 8kg one that can't fit the tires or bags you want. Prioritize capability over lightness.
Read answer →Bottom Bracket · BSA (Threaded)I keep seeing BSA threaded bottom brackets on gravel bikes—what's the advantage and should I care?
BSA is the traditional threaded bottom bracket standard—think of it like screwing a jar lid on and off. The cups thread right into the frame, which makes installation and removal straightforward with basic tools. No special press required, no trips to the bike shop for a swap. For gravel riding, BSA has a real edge. You're dealing with mud, stream crossings, and long days far from home. Threaded bottom brackets resist creaking and are far easier to service yourself—just unthread, clean, grease, and rethread. That matters a lot when you're bikepacking or riding through sloppy conditions. The trade-off is a slight weight penalty compared to press-fit options, and the narrower shell means a bit less frame stiffness. But for most gravel riders, the reliability and easy maintenance more than make up for a few extra grams. You'll find BSA most often on steel and titanium frames, where it fits the no-fuss, built-to-last philosophy.
Read answer →Bottom Bracket · Press-Fit 30 (PF30)I see some gravel bikes come with a PF30 bottom bracket — is that a good choice or should I look for threaded instead?
PF30 (Press-Fit 30) is a bottom bracket standard where the bearings press directly into a wider frame shell, accommodating a 30mm crank spindle. The main advantage is that the wider shell lets frame builders create a stiffer bottom bracket area while keeping weight down, which is why you'll mostly find PF30 on carbon gravel frames built for speed. The trade-off is maintenance. Press-fit cups can develop an annoying creak over time, especially in the muddy, wet conditions gravel bikes regularly see. Unlike threaded bottom brackets that simply screw in and out at home, PF30 requires a press tool for installation and removal — not ideal for trailside fixes. PF30 makes the most sense if you're prioritizing frame stiffness and low weight for racing or fast riding, and you don't mind more involved maintenance. For bikepacking or adventure riding where reliability and easy field repairs matter more, a threaded standard like BSA or T47 is generally the wiser choice.
Read answer →Bottom Bracket · BB86 (Press-Fit)I keep seeing BB86 listed on carbon gravel bikes — is that a good bottom bracket standard for gravel riding?
BB86 is a press-fit bottom bracket standard with a 41mm shell diameter, and you'll find it most often on carbon frames from major manufacturers. It's designed around Shimano's 24mm crank spindle, so crank compatibility is straightforward if you're running Shimano or similar setups. The wider shell allows frame builders to create a stiffer bottom bracket area, which translates to efficient power transfer when you're grinding up loose climbs. The trade-off is that BB86 shares the same potential downside as other press-fit standards: it can creak over time, especially with the mud, water, and grit that gravel riding throws at it. The bearings press directly into the frame shell rather than threading in, so removal and maintenance require specific tools and more effort than a threaded setup. If you're comparing gravel bikes and see BB86, it's not a dealbreaker — just plan on keeping the area clean and using quality installation paste. If low-maintenance ownership is a priority, you may prefer a threaded option like BSA or T47 instead.
Read answer →Bottom Bracket · T47 (Threaded)I keep seeing T47 bottom brackets on premium gravel bikes. What makes it special compared to other standards?
T47 is a newer threaded bottom bracket standard that essentially gives you the best of both worlds. Like traditional BSA threaded brackets, it screws right in—so it's easy to install, remove, and maintain at home, and it won't develop that annoying creak that press-fit brackets are infamous for. But unlike BSA, T47 uses a wider 47mm shell diameter, similar to press-fit designs, which lets frame builders create a stiffer bottom bracket area for better power transfer. For gravel riding, this matters more than you might think. You're regularly dealing with mud, water crossings, and gritty conditions that can make press-fit brackets creak and wear prematurely. T47's threaded design means you can service it on the road or trail with basic tools—no specialty press required. It's increasingly showing up on premium gravel frames, and while it shouldn't be your only reason to pick a bike, it's a meaningful quality-of-life upgrade that makes long-term ownership noticeably more pleasant.
Read answer →Front Axle · 12x100mm Thru-AxleWhat does 12x100mm thru-axle mean on a gravel bike, and does it matter for my wheel choices?
The 12x100mm thru-axle is the standard front axle on most modern gravel bikes. The numbers simply refer to the axle diameter (12mm) and the hub spacing (100mm). It threads directly through the hub and into the fork, creating a stiff, secure connection that keeps your brake rotor aligned consistently — which matters more than you'd think when you're descending loose gravel at speed. The big advantage of 12x100mm is wheel compatibility. Since it's the shared standard across gravel and road bikes, you'll have the widest selection of wheelsets to choose from if you want a second set for road riding or a replacement. You can swap between most gravel and road wheels without worrying about fit. Just don't confuse it with 15x100mm, which is a mountain bike standard found on some gravel bikes with suspension forks — those two are not interchangeable. If you're buying a standard gravel bike without suspension, 12x100mm is what you'll almost certainly get, and that's exactly what you want.
Read answer →Front Axle · 15x100mm Thru-AxleWhy does my gravel bike have a 15x100mm front axle instead of the usual 12x100mm?
If your gravel bike has a 15x100mm front thru-axle, it almost certainly has a suspension fork. This is the same axle standard used on mountain bikes, and suspension fork manufacturers design their forks around it. The 15mm diameter (versus the 12mm that's standard on most gravel bikes) provides a stiffer, more secure front end, which matters when you're hitting rough terrain with a suspension fork. The trade-off is wheel compatibility. Most gravel and road wheelsets are built for 12x100mm axles, so your options for swapping in a second wheelset are more limited. You'll need to look for wheels specifically designed with 15x100mm front axle compatibility, which often means mountain bike wheels. For most riders, this isn't a big concern—you bought a bike with suspension for a reason, and the wheels that come with it will serve you well. Just keep the axle standard in mind if you're shopping for a backup wheelset or a replacement thru-axle, since 12x100mm and 15x100mm are not interchangeable.
Read answer →Tire & Wheel System
Attributes governing tire and wheel compatibility, which define terrain capability.
What max tire width should I look for on a gravel bike, and does more clearance really matter?
Maximum tire clearance is the widest tire a gravel bike's frame and fork can fit, measured in millimeters. It's one of the most important specs because it determines how rough the terrain can get and how comfortable your ride feels. Gravel bikes typically range from about 32mm up to 57mm of clearance. For mostly road riding with occasional gravel stretches, 35–40mm is plenty. If you want a true all-rounder for mixed surfaces, 40–45mm is the sweet spot. Riders tackling rough singletrack or planning loaded bikepacking trips should look for 45mm or more. More clearance is almost always better because it keeps your options open if you want wider tires later. One thing to watch: a tire's actual width on your rim often runs 2–4mm wider than its labeled size. So if a bike has 42mm max clearance, a nominal 38mm tire might actually be too snug. Always leave a little breathing room.
Read answer →Wheel Size · 700c OnlyIs it a problem if a gravel bike only fits 700c wheels and not 650b?
Not necessarily — 700c is the most common wheel size for gravel bikes and works great for the majority of riders. It's the same diameter used on road bikes, so you get better roll-over performance and faster speeds on smoother gravel and paved sections. Tire selection is also much broader in 700c, giving you more options at various price points. A 700c-only frame really only limits you if you want to run very wide tires (47mm and up) for rough terrain or bikepacking. In that case, 650b wheels let you fit wider rubber within the same frame clearance. But if your typical rides involve gravel roads, fire roads, and mixed surfaces with tires in the 35–45mm range, 700c is ideal. If you're mostly doing gravel racing, fast group rides, or weekend adventures on moderate terrain, a 700c-only bike is a solid choice — not a compromise.
Read answer →Wheel Size · 650b OnlyWhat does it mean if a gravel bike only comes with 650b wheels, and is that a drawback?
A 650b wheel has a smaller diameter than the standard 700c (about 1.5 inches smaller), which lets you fit noticeably wider tires within the same frame clearance. On a 650b-only gravel bike, you can typically run high-volume tires in the 47mm+ range, giving you a plush, cushioned ride that absorbs rough terrain beautifully. This setup really shines for bikepacking and riding chunky, technical terrain where comfort and traction matter more than outright speed. The fatter tires at lower pressures conform to obstacles rather than bouncing over them, reducing fatigue on long days in the saddle. The trade-off is that you won't have the option to swap to a 700c wheelset for faster gravel races or smoother rides, and 650b tire selection is more limited than 700c. If your riding leans toward rough adventures rather than mixed-surface speed, 650b-only is a solid, purposeful choice — just know you're locked into that smaller wheel standard.
Read answer →Wheel Size · 700c + 650b (Dual)Should I get a gravel bike that fits both 700c and 650b wheels, or is one size enough?
Dual wheel compatibility lets you essentially have two bikes in one. Run 700c wheels with 35–40mm tires for fast gravel days and racing, then swap to 650b wheels with 47mm+ tires for bikepacking or rough terrain. The smaller 650b diameter lets you fit much wider tires within the same frame clearance, giving you a cushier, more confident ride on chunky surfaces. The catch is you'll need to buy that second wheelset, which isn't cheap. Also, make sure both wheelsets use the same brake rotor style so swapping is truly plug-and-play, not a workshop hassle. If you mostly ride similar terrain, a single wheel size is perfectly fine—700c has the broadest tire availability. But if your riding spans fast gravel races one weekend and loaded bikepacking adventures the next, dual compatibility is a game-changer that keeps one bike doing it all well.
Read answer →Drivetrain & Braking
Gearing and braking systems that determine climbing ability, shifting character, and stopping power.
Is a 2x drivetrain still a good choice for a gravel bike, or should I just go with 1x?
A 2x drivetrain (two chainrings up front) is absolutely still a great choice for gravel, especially if you spend significant time on pavement or smooth gravel roads. The main advantage is tighter gear steps — smaller jumps between gears — which helps you maintain a steady pedaling cadence as terrain and wind change. This feels more like a traditional road bike and many riders prefer it. One often-overlooked benefit: 2x systems can actually give you both a lower climbing gear and a higher top gear simultaneously. With 1x, you typically have to compromise on one end or the other. So if you're facing steep climbs but also want to keep pedaling on fast descents, 2x can cover that range better. The trade-offs are slightly more weight and more front shifts to think about. But for riders who value precise gear selection and split time between road and gravel, 2x remains an excellent option.
Read answer →Drivetrain · 1x (Single Chainring)Why would I choose a 1x drivetrain on a gravel bike?
A 1x (single chainring) drivetrain uses just one chainring up front paired with a wide-range cassette out back, which means you only shift with one hand — no more thinking about front derailleur adjustments. This simplicity is a big reason 1x has become the go-to choice for modern gravel bikes, especially if your rides lean toward rough terrain, bikepacking, or long days where mental fatigue is real. The biggest practical advantage is chain retention. On bumpy gravel and washboard descents, a 1x setup with a clutch derailleur keeps your chain firmly in place, reducing dropped chains. You also get a cleaner handlebar setup since there's no front shifter, leaving more room for bags, lights, or GPS units. The trade-off is larger jumps between gears compared to a 2x system, which can make it harder to find your perfect cadence on rolling terrain. Also, be careful not to choose too large a chainring — that's the most common mistake, leaving you without a low enough gear for steep climbs. Check that the lowest gear ratio suits your local terrain and fitness level.
Read answer →Lowest Gear (Climbing)What lowest gear ratio should I look for on a gravel bike if I want to climb comfortably?
The lowest gear ratio tells you how easy it'll be to pedal up steep climbs — it's calculated by dividing your front chainring teeth by the teeth on your largest rear cassette cog. A lower number means easier climbing. For example, a 38-tooth chainring paired with an 11-46 cassette gives you a ratio of about 0.83, which is quite friendly on hills. If you're planning loaded bikepacking trips or tackling steep, loose gravel climbs, aim for a ratio below 0.80 — your legs will thank you on long days. For moderate terrain without a heavy load, 0.80 to 0.90 is a solid range. Ratios above 0.90 are really only suitable if you live somewhere flat or you're a naturally strong climber. The biggest mistake riders make is not accounting for the weight of bikepacking gear. That extra 15–30 pounds transforms a climb that feels manageable on a test ride into a grueling grind. Always size your lowest gear for your heaviest scenario, not your lightest.
Read answer →Brakes · Hydraulic Disc (Flat-Mount)What does flat-mount mean on hydraulic disc brakes, and should I look for it on a gravel bike?
Flat-mount is the newer caliper attachment standard for hydraulic disc brakes, where the caliper bolts flush against the frame or fork rather than sitting on raised posts. It's become the go-to standard on most modern gravel bikes because it's sleeker, slightly lighter, and simply looks cleaner. Performance-wise, flat-mount hydraulic brakes deliver the same excellent stopping power and modulation as post-mount hydraulic systems — the difference is really just the mounting interface. You get consistent, powerful braking in wet, dry, and muddy conditions, which is exactly what you need when you're descending loose gravel roads. The main thing to know is that flat-mount is the current standard across gravel and road bikes, so finding replacement parts and upgrading down the line is straightforward. If you're shopping for a new gravel bike, flat-mount hydraulic disc brakes should be your default expectation — they're what most quality builds come with.
Read answer →Brakes · Hydraulic Disc (Post-Mount)Should I avoid a gravel bike with post-mount brakes if flat-mount is the newer standard?
Not at all — post-mount hydraulic brakes deliver the same stopping power and modulation as flat-mount. The difference is really just the caliper attachment style and a slightly bulkier look at the brake. You won't feel any performance gap on the trail. Where post-mount actually shines is compatibility. Because it's been the mountain bike standard for years, replacement calipers and parts are widely available, often at lower prices than flat-mount equivalents. If you ride a gravel bike with MTB-influenced geometry or an older frame design, post-mount is likely what you'll find, and that's perfectly fine. The only real consideration is frame compatibility — you can't swap between mount types without an adapter or a new frame. So if you're building up a bike from scratch or planning future upgrades, just make sure your caliper type matches your frame mounts. Either way, you're getting the hydraulic performance that matters for gravel riding.
Read answer →Brakes · Mechanical DiscI found an affordable gravel bike with mechanical disc brakes—are they good enough, or should I hold out for hydraulic?
Mechanical disc brakes use cables to activate the caliper, similar to traditional rim brakes. They'll stop you, but they lack the smooth, progressive feel—called modulation—that hydraulic brakes provide. On loose gravel surfaces where finesse matters, that difference becomes very noticeable, especially on long descents. That said, mechanical discs show up on entry-level gravel bikes for a reason: they keep costs down. If you're mostly riding flat terrain at casual speeds, they'll get the job done. Just know that lever feel can feel spongy over time, and cable adjustments are more frequent. If you can stretch your budget, hydraulic disc brakes are genuinely worth it for gravel riding. They offer far better control and consistency in wet or muddy conditions, and require less ongoing maintenance. Many riders who start with mechanical discs end up upgrading anyway, so if you're planning to ride regularly—especially on hills—save up for hydraulic from the start.
Read answer →Geometry & Handling
Frame geometry measurements that define steering character, stability, and riding position.
What does the stack-to-reach ratio mean on a gravel bike, and how do I know which number is right for me?
The stack-to-reach ratio compares how tall a frame is (stack) versus how far it stretches you forward (reach). It's the single best number for cutting through marketing claims and understanding a gravel bike's true character — more telling than either measurement alone. A ratio below 1.45 gives you a low, aggressive, race-oriented position — fast but demanding. The 1.45–1.55 range is the versatile sweet spot most riders should target, balancing comfort and efficiency for mixed-terrain adventures. Above 1.55, you're in endurance and bikepacking territory, with an upright position built for long days in the saddle. Choose based on your priorities: racing or going fast, lean lower; exploring and all-day comfort, go higher. Just don't assume more upright always means more comfortable — being too upright can actually cause hand numbness on longer rides since your weight shifts differently.
Read answer →Chainstay LengthWhat chainstay length should I look for in a gravel bike, and how does it affect the ride?
Chainstay length measures the distance from the bottom bracket to the rear axle, and it shapes how your gravel bike handles. Shorter stays (415–425mm) make the bike feel snappy and quick to respond—great for racing or spirited rides on mixed terrain. Longer stays (435mm and up) add stability and make the bike feel more planted, especially when loaded with gear for bikepacking. The middle range of 425–435mm offers a versatile balance that works well for most riders who want one bike for everything from fast day rides to weekend adventures. A common mistake is assuming shorter is always better—longer chainstays dramatically improve stability with frame bags and gear. If you're planning to run a large frame bag for bikepacking, definitely check chainstay length before you buy, as longer stays provide the clearance you'll need.
Read answer →Head Tube AngleWhat head tube angle should I look for in a gravel bike, and how does it affect the ride?
Head tube angle is the angle of the front tube relative to the ground, and it shapes how your gravel bike steers and feels. Steeper angles (closer to vertical) make the steering quicker and more responsive, while slacker angles (more laid-back) add stability at speed and on rough descents. For most gravel riders, 71–72° is the sweet spot, giving you a nice balance between quick handling and off-road confidence. If you're leaning toward racing or faster group rides on smoother gravel, look for steeper angles around 72–73°. Prefer bikepacking adventures or tackling chunky, technical terrain? A slacker angle in the 69–71° range will feel more planted and stable. One important note: don't judge head angle alone. The trail measurement—affected by your fork offset—works hand-in-hand with head angle to determine steering feel. And while slacker sounds better for off-road, going too slack can make climbing feel sluggish and vague.
Read answer →Comfort & Suspension
Features that reduce fatigue and improve control on rough surfaces.
Do I need a suspension fork for gravel riding, or is a rigid carbon fork enough?
For most gravel riders, a rigid carbon fork is all you need. Carbon naturally absorbs road vibrations through its material properties, so even without moving parts, it takes the edge off choppy terrain. Combined with wider tires (40mm or more) run at lower pressures, a rigid carbon fork handles smooth-to-moderate gravel, dirt roads, and even chunkier stuff just fine. The big advantages are weight savings—suspension forks add 400-600 grams—and zero maintenance. No seals to service, no bushings to wear out, and you keep full mounting options for bikepacking gear. That's why most gravel racers and everyday riders stick with rigid carbon. Where it falls short is on relentless washboard roads, very rocky terrain, or if you deal with hand or wrist fatigue on long days. In those cases, micro-suspension or a Future Shock system can make a real comfort difference. But for 90% of gravel riding, rigid carbon is the lighter, simpler, faster choice.
Read answer →Front Suspension · Rigid (Steel Fork)Why would I choose a gravel bike with a rigid steel fork over carbon or suspension?
A rigid steel fork doesn't have suspension, but the steel itself naturally flexes to absorb road buzz and small bumps—more so than a rigid carbon fork. This built-in compliance makes long days in the saddle more comfortable without adding the weight and maintenance of a suspension fork. Steel forks really shine when durability is your top priority. They're virtually indestructible, which is why they're a go-to for bikepacking builds where you're loading up with gear and riding remote routes far from a bike shop. If you crash or hit something hard, steel bends rather than cracks, and it can often be repaired in the field. The trade-off is weight—steel forks are heavier than carbon. But for riders who value reliability over speed, especially on multi-day adventures with heavy loads, that extra weight buys serious peace of mind. If you're racing or sticking to smoother gravel, carbon or suspension may suit you better.
Read answer →Front Suspension · Micro-Suspension (20-40mm)When is micro-suspension on a gravel bike actually worth it over a rigid fork?
Micro-suspension (20–40mm of travel) shines when you're regularly riding rough, chunky gravel, washboard roads, or long days where hand fatigue becomes a real issue. If your gravel routes include a lot of jarring terrain or you have wrist or hand problems, a short-travel fork like the RockShox Rudy or Fox 32TC can make a noticeable difference in comfort and control. The tradeoff is weight and complexity. These forks add roughly 400–600g compared to a rigid carbon fork, and they require periodic maintenance like any suspension. They also reduce your mounting options, which matters if you're into bikepacking with fork-mounted bags. For most gravel riding—smooth fire roads, moderate terrain, even gravel racing—a rigid fork with wide tires (40mm+) run at lower pressure handles things just fine and keeps the bike lighter and simpler. Micro-suspension is really for riders who frequently battle rough surfaces and want that extra cushion without moving to a full mountain bike.
Read answer →Front Suspension · Suspension Stem/Head TubeWhat is a suspension stem or head tube system on a gravel bike, and who is it a good fit for?
A suspension stem or head tube system (like Specialized's Future Shock) builds about 20mm of travel directly into the steerer tube or stem area, rather than using a traditional suspension fork. It absorbs chatter and small bumps to reduce hand and wrist fatigue on rough gravel without the weight and bulk of a full suspension fork. This setup is a great middle ground if you want more comfort than a rigid fork provides but don't want the added weight, reduced mounting options, or maintenance that come with a micro-suspension fork. It's especially appealing for riders who tackle mixed terrain—smooth gravel one day, washboard the next—but still want a bike that feels efficient on smoother stretches. The trade-off is that these systems are proprietary, so you're locked into that brand's components. If you ever want to swap stems, service the suspension, or upgrade down the road, your options are limited compared to a standard fork setup.
Read answer →Seatpost · Dropper SeatpostDo I really need a dropper seatpost on a gravel bike, or is that just a mountain bike thing?
A dropper seatpost lets you lower your saddle with a handlebar-mounted lever while riding, which makes a huge difference on steep or technical descents. It's not just for mountain bikes anymore—droppers are increasingly common on gravel bikes because they let you shift your weight back and lower for confidence on rough singletrack, steep fire roads, and loose descents. The trade-off is weight. Dropper posts add 200-400 grams compared to a standard seatpost, and they require occasional maintenance. If you mostly ride smooth gravel roads or prioritize racing performance, you might prefer the lighter, simpler setup of a rigid post. That said, if your gravel adventures include technical terrain where you want to get behind the saddle, a dropper is transformative. Many riders find it's the single best upgrade for descending confidence. Just be sure to check your frame's seatpost diameter before buying one—some gravel frames use non-standard sizes that limit your options.
Read answer →Seatpost · Compliance SeatpostWhat does a compliance seatpost do, and is it worth getting one for gravel riding?
A compliance seatpost is designed to flex and absorb vibrations from rough terrain, giving you 10–30mm of effective travel without the complexity of a full suspension system. Posts like the Ergon CF3 or Cane Creek eeSilk use clever pivoting designs or specialized carbon layups to take the edge off washboard gravel and chunky fire roads. This type of seatpost is always active—there's no remote lever to manage—so it just quietly does its job whenever you're seated. It's especially worth considering if you ride long distances on rough gravel, struggle with lower back or saddle discomfort, or simply want a smoother feel without adding a dropper post. If your gravel rides lean toward smooth roads and mild trails, a standard rigid post will likely serve you fine. But for bikepacking, endurance events, or all-day adventures on chunky terrain, a compliance post can be a game-changer for comfort.
Read answer →Seatpost · Standard Rigid SeatpostIs a standard rigid seatpost still a good choice for a gravel bike, or do I really need a dropper or compliance post?
A standard rigid seatpost is still a solid choice for certain gravel riders. If you're primarily riding smooth gravel roads, racing where every gram counts, or you naturally stand on descents rather than staying seated, a rigid post keeps your bike light and simple with nothing to maintain or malfunction. That said, you can still squeeze out some comfort. Carbon rigid posts naturally absorb more vibration than aluminum ones, and the seatpost diameter matters more than most people realize—a 27.2mm post will flex noticeably more over bumps than a thicker 30.9mm or 31.6mm post, giving you a bit of free compliance. Just know what you're giving up: no on-the-fly saddle height adjustment for technical descents, and no built-in shock absorption for long, rough days in the saddle. If your gravel adventures lean toward chunky singletrack or all-day bikepacking on rutted roads, you may find a rigid post leaves you wanting more comfort and control.
Read answer →Versatility & Bikepacking
Attributes that determine the bike's adaptability for touring, bikepacking, and accessory mounting.
How many mounting points do I actually need on a gravel bike?
Mounting points are the threaded bosses on your frame and fork that let you attach bottle cages, racks, fenders, and other accessories. Gravel bikes range from about 4 to 20 mounting points, and the right number depends on how you ride. If you mostly do fast day rides or gravel racing, 4–8 points is plenty — that covers two or three bottle cages with little else. For all-around riding that might include commuting or light touring, 8–12 points is the sweet spot, typically giving you three bottle positions plus fender and rack mounts. Bikepackers and long-distance adventurers should look for 12 or more points, including fork blade mounts (critical for front bags), under-downtube bottle bosses, and full rack eyelets. Just be honest about what you'll actually use — paying for mounts you never need adds cost, and unused bosses are just extra weight on the frame.
Read answer →Bar FlareWhat degree of handlebar flare should I look for on a gravel bike?
Handlebar flare refers to how much the lower drop sections of your handlebars angle outward compared to the hoods position. On gravel bikes, this outward sweep improves stability and control when you're riding in the drops on rough terrain, since it effectively widens your hand stance. For most gravel riders, 8–16° of flare is the sweet spot. This range gives you noticeably better control in the drops without making the hoods position feel excessively wide or awkward. If you primarily ride smoother gravel roads and spend most of your time on the hoods, something closer to 0–5° (essentially a road-style bar) may feel more natural. Riders tackling technical, loose, or steep off-road terrain often prefer 16–25° of flare for maximum leverage and stability. Just keep in mind that more flare isn't always better—excessive flare can make the hoods feel too far apart and less comfortable on longer rides. Hand position preference is highly personal, so test-riding different flared bars is the best way to find what works for you.
Read answer →